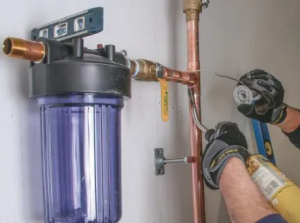
A Step-by-Step Guide to Installing a Home Water Filter

Ensuring the quality of your drinking water is crucial for your health and well-being. Installing a home water filter is a proactive step towards safeguarding your family from contaminants. Whether you’re a seasoned DIY enthusiast or a novice, this guide will walk you through the process of installing a basic under-sink water filter system. Let’s dive in!
Choose the Right Water Filter
Before you start, it’s essential to select the right water filter based on your needs. Consider factors such as the specific contaminants you need to remove, the size of the system, and your budget. Under-sink filters are popular for their efficiency and relatively straightforward installation process.
Gather Your Tools and Materials
Prepare the necessary tools and materials before you begin. You’ll typically need:
- Adjustable wrenches
- A drill with a bit set (for drilling a hole in your sink or countertop, if required for the faucet)
- Teflon tape
- A bucket or towel to catch any drips
- The water filter kit (which should include the filter unit, filter cartridges, and a dedicated faucet if not using an existing one)
Shut Off the Water Supply
Locate the cold water supply valve under the sink and turn it off. Open the cold water tap above to release any pressure and drain remaining water in the pipe.
Install the Filter Faucet (If Necessary)
If your filter system comes with a dedicated faucet, you may need to drill a hole in your sink or countertop. Ensure it’s placed in a convenient location and follow the manufacturer’s instructions for installation.
Connect the Water Filter System
- Identify the Cold Water Line: You’ll be installing the filter on this line. If you’re unsure, the cold water line is typically on the right.
- Install the Filter’s Mounting Bracket: Choose a suitable location under the sink to mount the filter. Ensure there’s enough clearance for installing the filter cartridges and future maintenance.
- Cut the Cold Water Line: Use a pipe cutter to make a clean cut on the cold water line where you’ll insert the filter. Be prepared to catch any water left in the line.
- Attach the Filter’s Inlet and Outlet: Follow the manufacturer’s instructions to connect the inlet and outlet hoses or pipes to the filter. Use Teflon tape on the threads to ensure a watertight seal.
- Secure the Connections: Tighten all connections with adjustable wrenches, but be careful not to overtighten and damage the fittings.
Install the Filter Cartridges
Insert the filter cartridges into the housing according to the manufacturer’s instructions. Make sure they’re properly seated to prevent leaks.
Turn On the Water and Check for Leaks
Slowly turn on the cold water supply and check all connections for leaks. Tighten any fittings if necessary. Let the water run through the new faucet for a few minutes to clear any air and carbon fines from the filter.
Maintenance and Filter Replacement
Remember, regular maintenance is key to ensuring your water filter continues to operate effectively. Keep track of the filter replacement schedule recommended by the manufacturer to maintain optimal water quality.
Conclusion: Enjoy Clean, Filtered Water
Congratulations! You’ve successfully installed a home water filter. Now, you can enjoy the peace of mind that comes with having access to clean, safe drinking water right from your tap. Remember, the initial effort and investment in installing a water filter can lead to long-term health benefits for you and your family.
